Please check this page here for common generic printing issue first.
If the printer isn't printing anything:
-
- Check that the printer is plugged straight into the iPad with the iPad charging cable, and that it's firmly plugged in on both ends.
- Check that the iPad shows as charging (in the little battery symbol at the top right).
- If it isn't, please try a new cable (and ensure that it is an MFi certified cable)
- Check that the backoffice settings are correct:
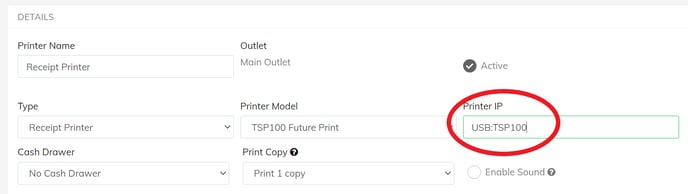
- First, go to Setup > Printers. Ensure that you see the type of printer available (i.e receipt for a receipt printer)
- Then check that the IP address field is correct - it should look like this:
- Then go to Setup > Registers. Click on the pencil button for the register profile that you're currently using. Then check that the correct printer name is selected here:
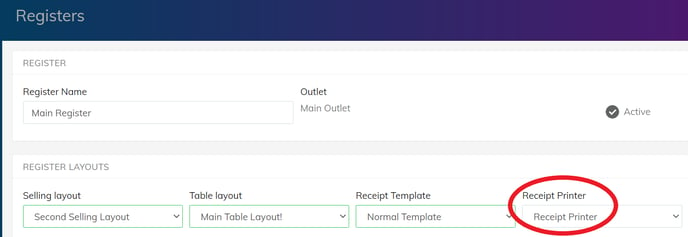
- and here:

- Then, on your POS app, tap on the logo at the top left corner to sync it and try again.
- If it's still not printing, your printer may need an update. Please download the Star Micronics app and follow the steps here to update the printer firmware.
If the printer is only printing intermittently:
-
- Check that the printer is plugged straight into the iPad with the iPad charging cable, and that it's firmly plugged in on both ends. If the cable is loose then this might affect the connection now and then - try a new cable.
- If the printer is just not printing some products, this means that the printing settings on the product may not be correct. Check this in the backoffice:
- Go to Products > Product List.
- Search for the product that is not printing and click on the pencil button to edit it.
- Scroll down to the very bottom and make sure that the product is set to print to the correct place:

- Then click Submit to save any changes and refresh on the POS app with the logo at the top left to sync the changes.