There are various ways to connect to your MC-Print3 printer. Firstly you'll need to check which connections your model supports. If you don't which connections your model supports, please click here.
If you have a TSP100/143 model, please click here for the setup steps.
There are three main stages to connecting the printer - please follow these below:
- The iPad
-
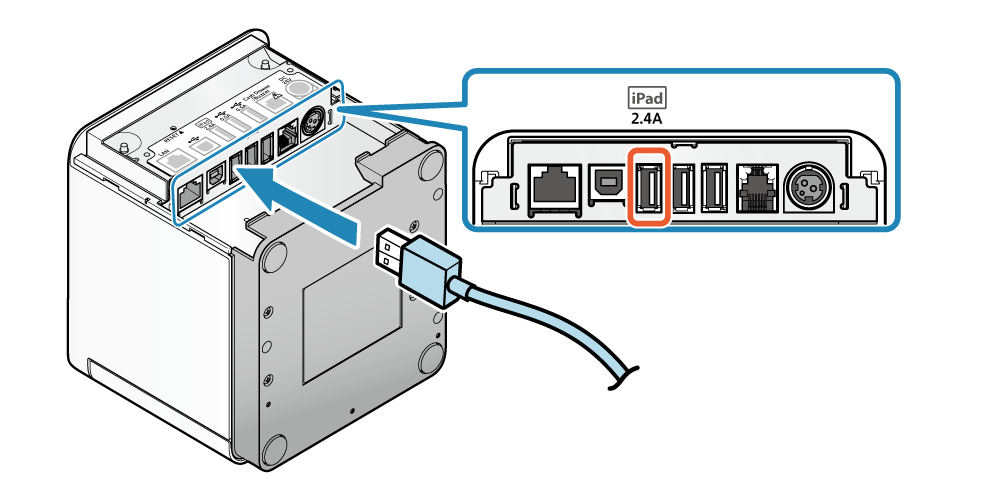
Connect your iPad’s USB cable to both the iPad itself and the USB port located at the rear of the printer. Please note that this needs to be a genuine Apple MFi-certified USB cable!
-
- The Printer
- Firstly make sure the printer is plugged into the power socket, turned on, and has enough paper.
- Ensure that your printer is plugged into a power source and that the power cable is securely fastened to the back of the printer:
-
- The Back Office
- In the back office select the ‘Setup‘ tab on the left-hand side and then click ‘Printers‘.
- Identify the relevant printer and select ‘Edit‘ by clicking the pencil icon to the right of the printer bar. In the IP address box, simply type in USB:mC-Print3
- For the model, select mCPrint-3 from the dropdown.
- Do not forget to click ‘Submit‘ to ensure the changes are saved, and to tap on the logo in the top left corner of the POS app to sync the new printer settings.