There are various ways to connect to your MC-Print2 printer. Firstly you'll need to check which connections your model supports. If you don't which connections your model supports, please click here.
There are three main stages to connecting via LAN to your printer - please follow these below:
- The iPad
- Press the home button on the iPad and navigate to the iPad Settings. Make sure your WiFi is turned on and connected to the same WiFi network that the printers should be connected to.
- Please make sure that you select “forget network” on any other networks listed.
- For newer iPads, you also need to make sure the SumUp POS app has permission to access your local network - go down along the left hand side menu and select SumUp POS, and then turn on "Local Network".
- The Printer
- Firstly make sure the printer is plugged into the power socket, turned on, and has enough paper.
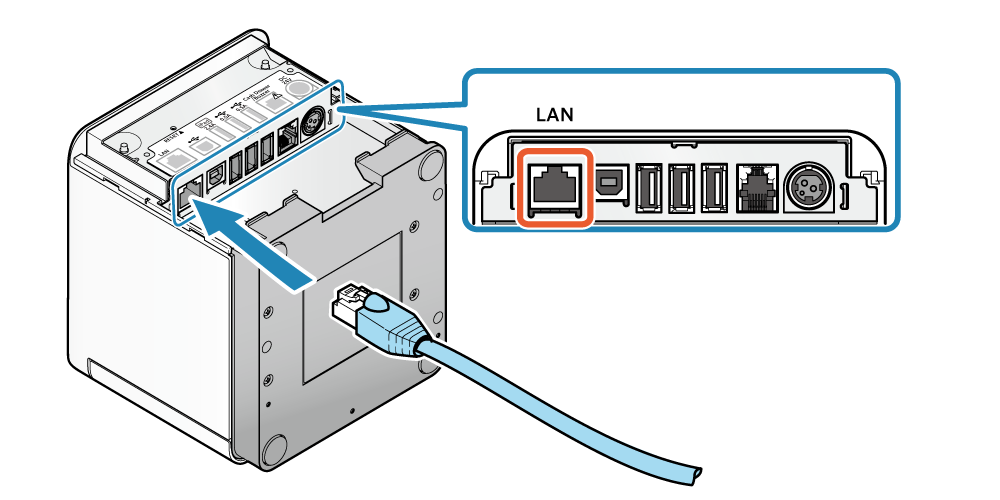
- Ensure that the ethernet cable is firmly plugged in on both ends:
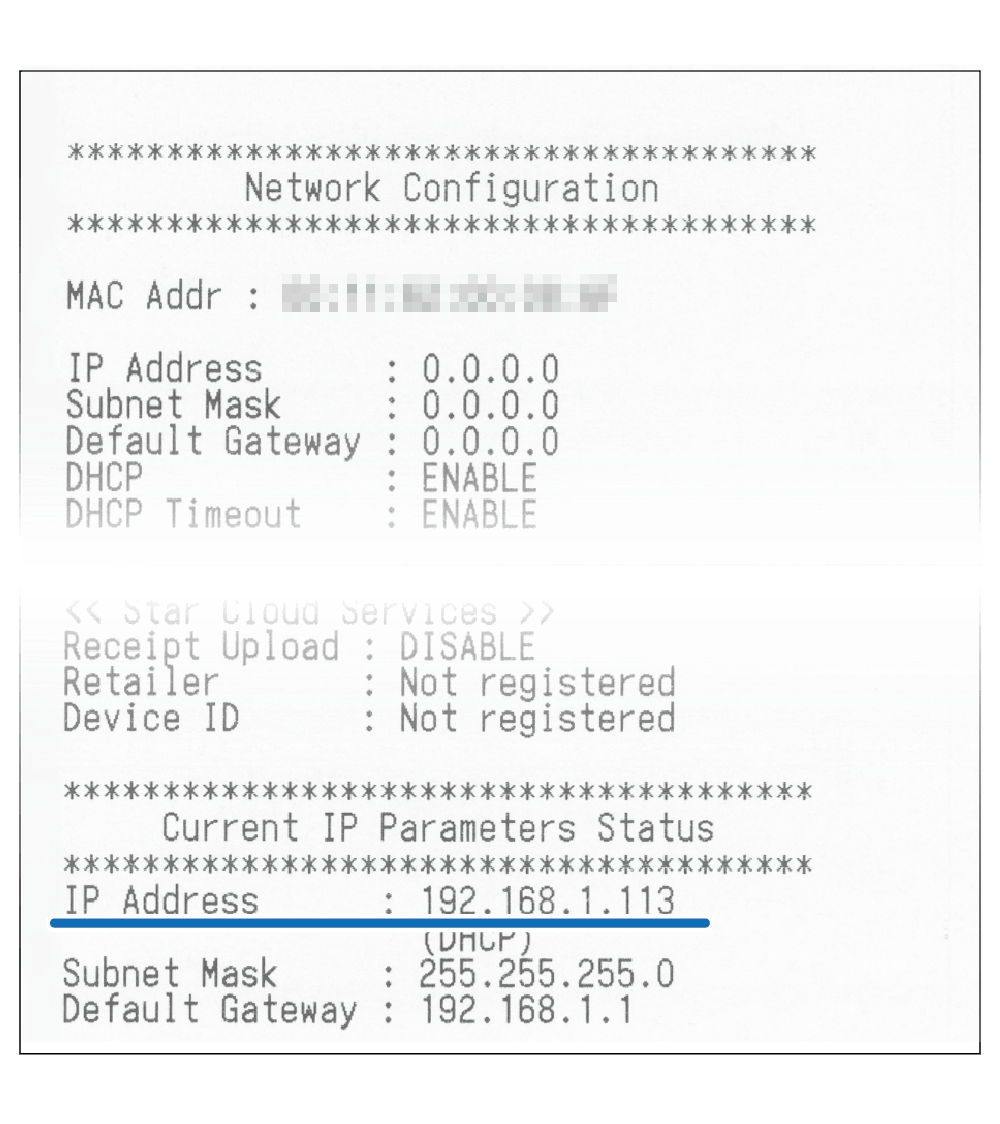
- You’ll need to obtain the IP address. To do this perform a self printing slip (click here for how to do this). The IP address will appear at the bottom of the slip under the "Current IP Parameters Status":
- The Back Office
- In the back office select the ‘Setup‘ tab on the left-hand side and then click ‘Printers‘.
- Identify the relevant printer and select ‘Edit‘ by clicking the pencil icon to the right of the printer bar. In the IP address box, simply type in the new numbers without changing any other format and so that the beginning of the printer’s IP remains TCP:###.###.#.###
- Change the model to select mCPrint-2 from the dropdown.
- Do not forget to click ‘Submit‘ to ensure the changes are saved, and to tap on the logo in the top left corner of the POS app to sync the new printer settings.
Please note you will need to make the IP address Static. To do this, please follow the steps here.