
The SumUp POS app supports adding products and assigning customers to a sale by scanning the barcode or QR code using either the iPad’s built-in cameras or a connected handheld scanner. The Stock app is also capable of using the iPad’s built-in cameras or a connected handheld scanner to do stock takes.
Scanning product barcodes
iPad camera
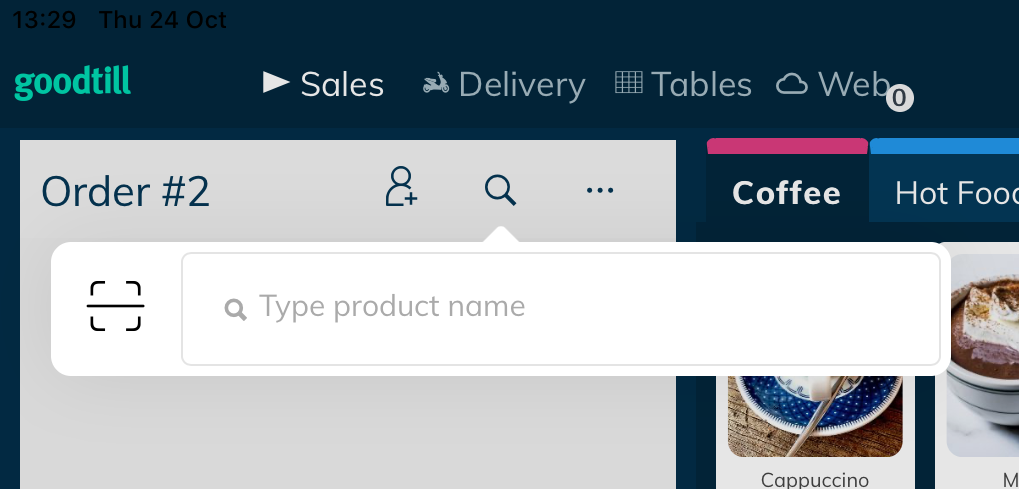
To scan with the iPad’s built in camera, click the product search button, then the scan button. You can switch between the front and rear cameras if required (eg if the rear camera is obscured by a case or stand).
Handheld scanner
Once a scanner is connected, scan a product while the POS app is open on any screen. If the product is found it will be added to the open sale.
Scanning customer barcodes
iPad camera
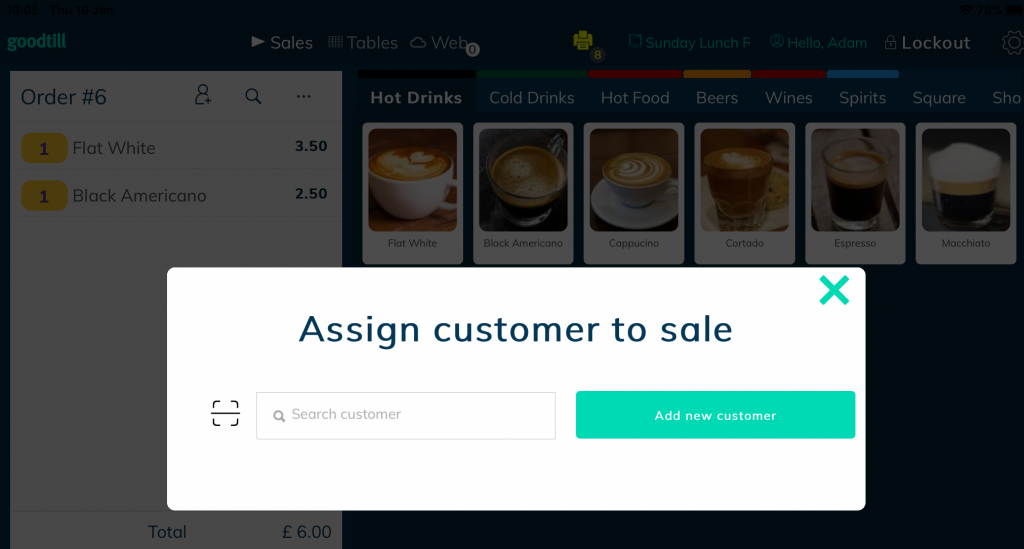
To scan with the iPad’s built in camera, click the customer assign button, then the scan button. You can switch between the front and rear cameras if required (eg if the rear camera is obscured by a case or stand).
Handheld scanner
If the customer barcode is open in our Goodies loyalty app, you can scan the barcode from any screen. If the customer barcode is one you have distributed yourself (either via an app or physical card), you will need to tap the customer assign button and scan once the modal has opened.
Supported handheld scanners
The following table lists the scanners supported by the current version of the POS application.
1D scanners only allow scanning simple barcodes whereas 2D scanners can also scan QR codes.
| Scanner | Barcode types | Connection type |
|---|---|---|
| Socket Mobile SocketScan S860 | 1D, 2D | Bluetooth |
| Socket Mobile SocketScan S800 | 1D | Bluetooth |
| Socket Mobile SocketScan S740 White Blue Red | 1D, 2D | Bluetooth |
| Socket Mobile SocketScan S700 White Blue Red | 1D | Bluetooth |
| Socket Mobile CHS 7Xi | 1D, 2D | Bluetooth |
| Socket Mobile CHS 7Ci | 1D | Bluetooth |
Support manuals
Please click here for the user manuals for your scanner.
Connecting a handheld scanner
We strongly recommend using the Socket Companion App on your iPad (available for free from the App Store) to connect your scanner to your iPad, as it will take you through the steps and allow you to control the scanner settings easily.
If you don't want to use the Socket Companion app to setup the scanner, follow these steps to connect a supported Socket Mobile bluetooth scanner:
- Turn on the scanner by pressing the power button.
- Scan the iOS/MFi-SPP mode barcode in the getting started guide / command sheet included with your scanner.
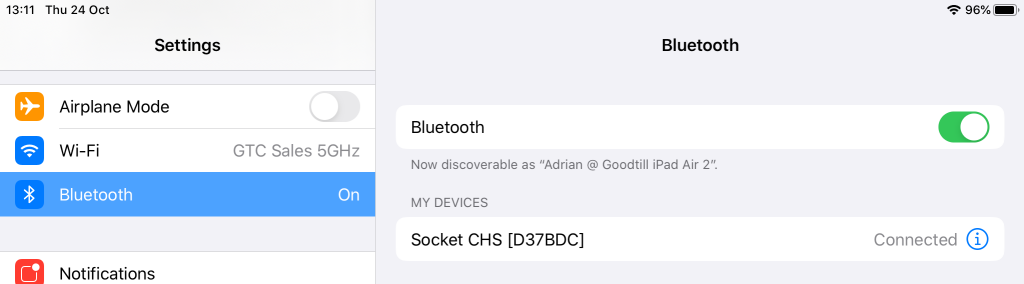
- Navigate to the iOS bluetooth settings page on the iPad (Settings app > Bluetooth) and enable if required.
- Select the scanner from the list, it will likely be named after the scanner model.
- The scanner should now appear as connected.
To reset the connection or to enable pairing mode you can press power and trigger button at the same time for the iPad to connect to the scanner again.
If you have lost your getting started guide / command sheet needed to enter iOS mode, you can download the correct command sheet from the Socket Mobile Website.
Supported formats
You can use any barcode format supported by your chosen handheld scanner or the camera scanner in the SumUp POS app. The following formats are supported by the camera barcode scanner and all supported handheld scanners:
| Format | Length | Barcode type |
|---|---|---|
| UPC-A | 12 digits | 1D |
| UPC-E | 6 digits | 1D |
| EAN-13 | 13 digits | 1D |
| EAN-8 | 8 digits | 1D |
| Code 39 | Variable | 1D |
| Code 93 | Variable | 1D |
| Code 128 | Variable | 1D |
| PDF417 | Variable | 2D |
| QR code (any format) | Variable | 2D |
When entering barcodes into the system, please ensure that you enter all digits present in the barcode including leading 0s.
Adding barcodes to products
You can use either of the methods below to add barcodes to your products. After updating the products, please allow up to a minute for the changes to be sent to the iPads.
Via the product spreadsheet
The easiest way to add barcodes is by populating the barcode column in the product spreadsheet when importing your products in to SumUp POS. You only need to add barcodes to simple (non-variable) products and product variants, do not add barcodes to the variable product header rows (rows where has_variant is 1). In the barcode column, enter a barcode in one the supported formats listed above.
If you have already imported your products and want to bulk-update the barcodes, you can enter the barcodes on a spreadsheet for SumUp POS support to update:
- Export a CSV of your existing products – In the back office, go the product page and click “Export CSV”.
- Add product barcode in the `barcode` column.
- Save the spreadsheet and send the file to pos.support.uk.ie@sumup.com and request your barcodes to be updated.
Via the back office
Product barcodes can be edited by going to navigating to an individual product, entering the barcode and saving the product. If the product has variants, you will need to view the variants as the variant barcodes are not displayed on the main product page.
Adding barcodes to customers
The Goodies app provides barcodes
When a customer barcode is scanned, the system will read the value stored in the barcode and look for a customer record where either the ID or Membership No matches the barcode value.
If you have already generated IDs for your customers (possibly because these exist from a previous system), you can set these as the customer Membership No by editing the customer in the backoffice. Please ensure that the values are unique per customer.
If you don’t have IDs generated already, you can use the SumUp POS customer ID which is already generated and guaranteed to be unique. To get the ID, go to the customer page in the backoffice and click “Export CSV”.
If you already have physical loyalty cards for customers (eg due to a previous system), you will be able to use these as long as the barcode format is supported by the POS app and/or your handheld scanner. Simply enter the values as the customer Membership No in the backoffice.
Once the customer barcodes are set in the backoffice, please allow up to a minute for this data to sync to the iPad.
Troubleshooting
Product not found when scanning a barcode
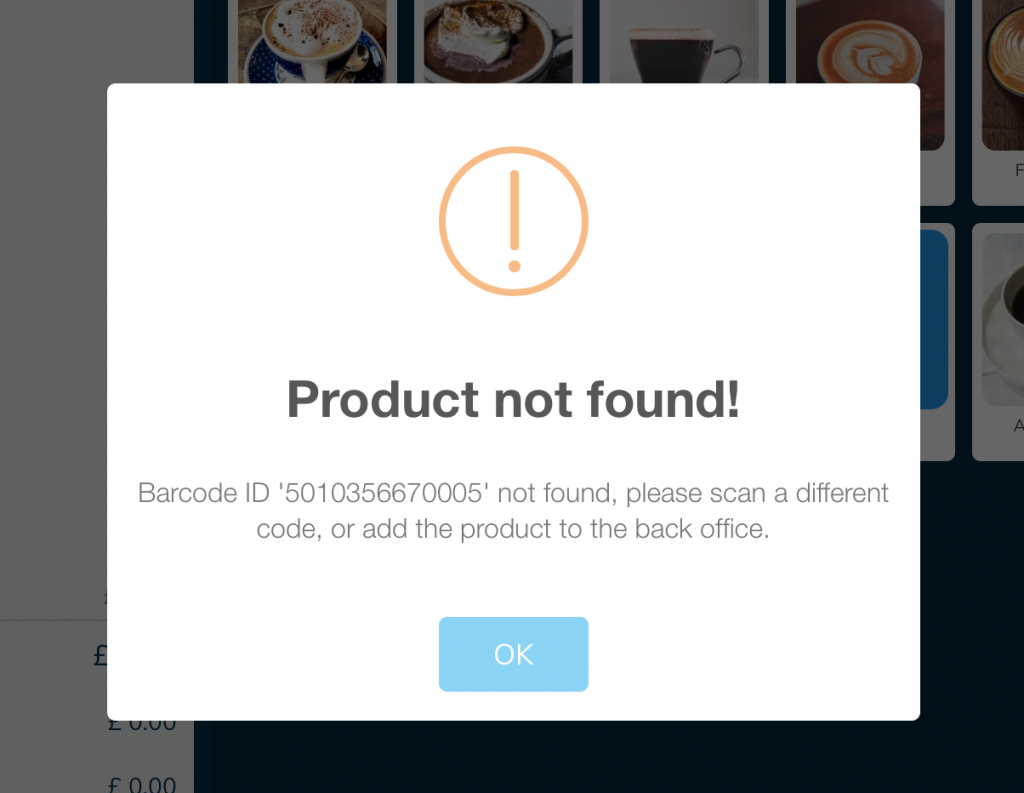
If you receive a “Product not found!” error when scanning a product on the POS, first check that the barcode in the error message matches the barcode on the product. If the barcode listed does not match the product this may indicate an issue with the scanner hardware.
If the barcode listed is correct, please ensure that the product is configured with this barcode by searching for the product name in the backoffice, inspecting the product and check that the barcode field is populated correctly.
Sometimes when populating barcodes via a spreadsheet, the spreadsheet program will convert the barcode to scientific notation (eg 1.2345678905e10) which will cause the value to be malformed and not recognized correctly.
Scanner not appearing in iOS settings
If this happens, please turn off the scanner (hold the scan and power buttons until it beeps) the follow the connection instructions above (including scanning the iOS mode barcode).
