Kitchen Display Screen (KDS) App
The iPad-based screen operates over WiFi so you do not need to run network cabling into your kitchen for traditional receipt/order printers. As soon as an order and any modifiers are taken at the table by the staff, it is displayed in the kitchen via a simple graphical user interface.
Step 1
Download the KDS app from the App Store.
Step 2
Log in to the app (generally with the same details as your POS app).
Step 3
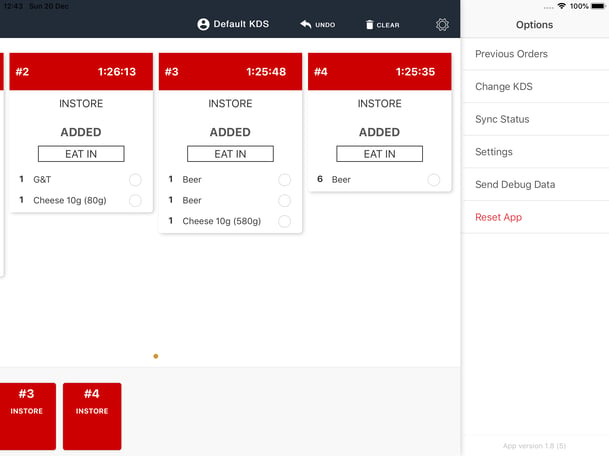
This will then take you to the main screen. Please select the cog icon at the top right to view the options menu as below:

Step 4
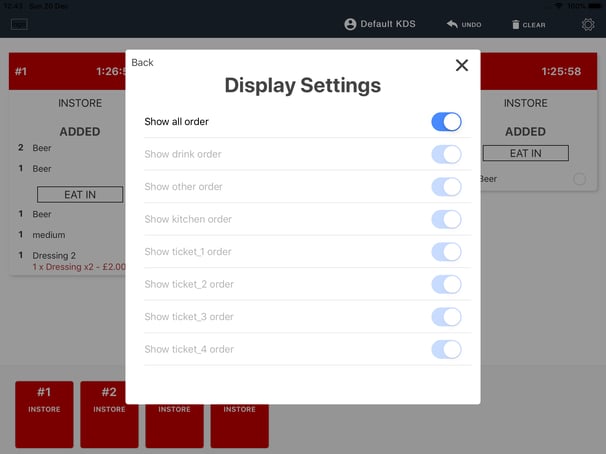
Select Settings, and then select Display Settings as below:

This will control what orders will show on your KDS. So you may want everything to show, but you can alter this to only show drinks products, kitchen products etc.
To check and change whether a product is marked as drinks or kitchen, you will need access to the back office. In the back office go to Products > Edit Product > Scroll down to the bottom to Printing and KDS > Check the correct boxes:

Step 5
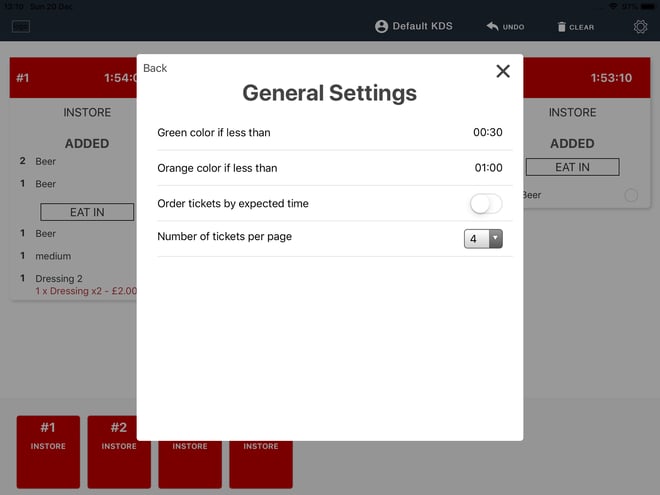
Once you’ve selected what products you want to show on your KDS, go back to Settings and select General Settings:

Here you can select the colour that the order will show depending on how long it’s been waiting.
Step 6
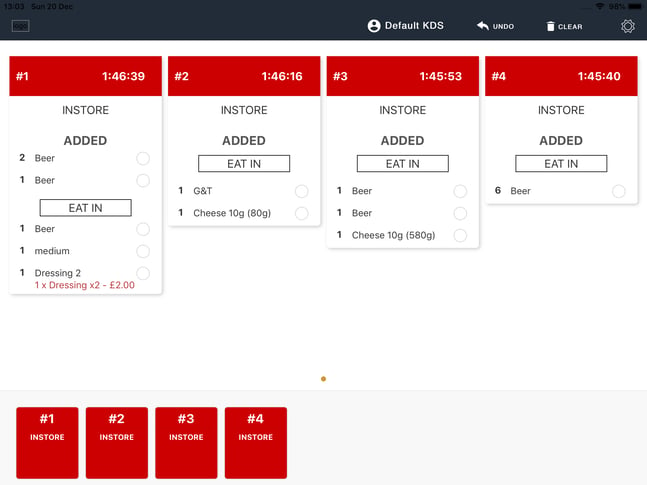
Now your settings are in place, you can test putting through an order on your POS app, and it will show as below on the KDS:

You can tick the items off as you go and swipe up the whole order once complete:
If you swipe by accident you can press “UNDO” at the top to recover the order. You can view completed orders by selecting the cog at the top right, and selecting “Previous Orders”.