Printing and Emailing Voucher QR codes
Setting up Vouchers in the Backoffice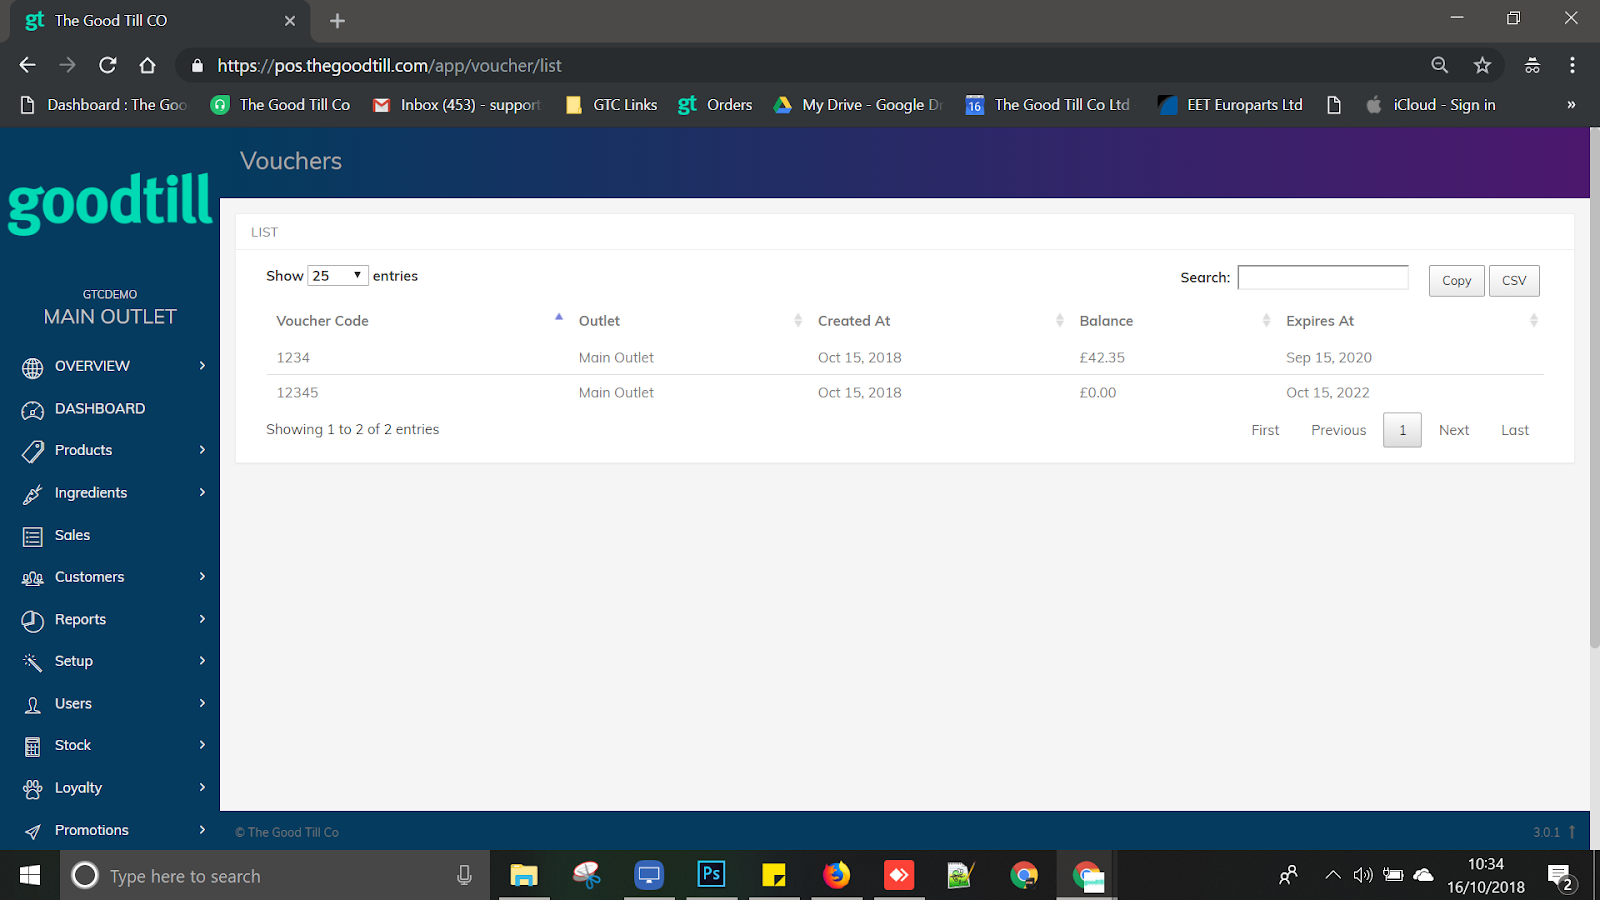
To see your vouchers and create new ones, navigate to the PRO tab along the left-hand side of the page and click on vouchers.
You can choose to import vouchers in bulk by using the “Import Gift Cards/Vouchers” button:

If you select this, it will give you the format in which we need it to be uploaded correctly.
Please note that the date must be formatted as year-month-day - eg: yyyy-mm-dd
You can also add these in manually by selecting "Add new gift card/voucher" at the top right.
Then type in the code, and the amount (without a £/$ symbol), and press Submit: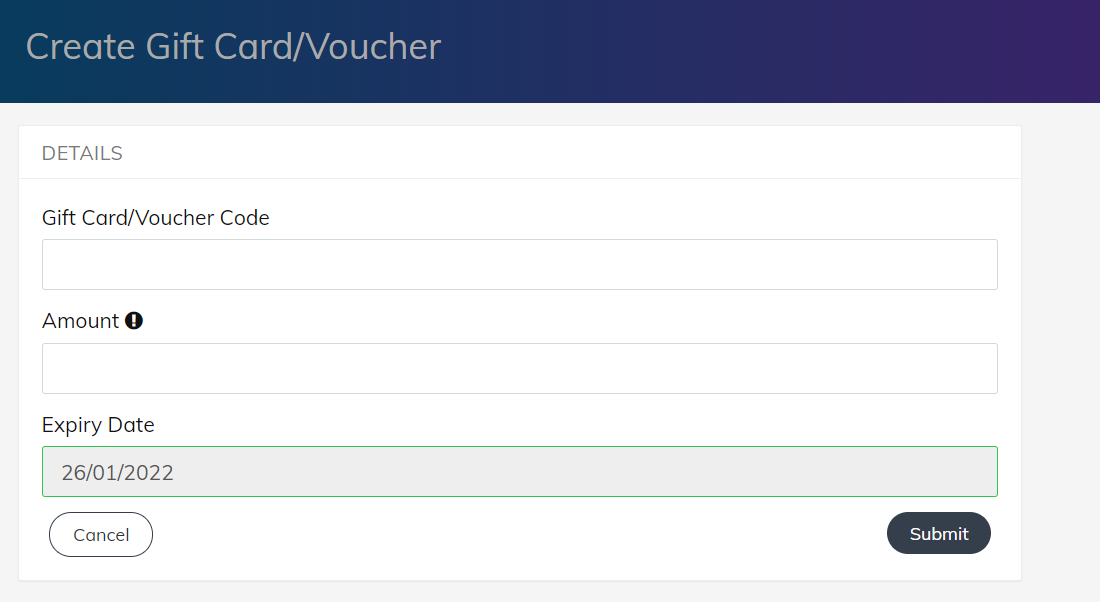
Selling Vouchers - POS App
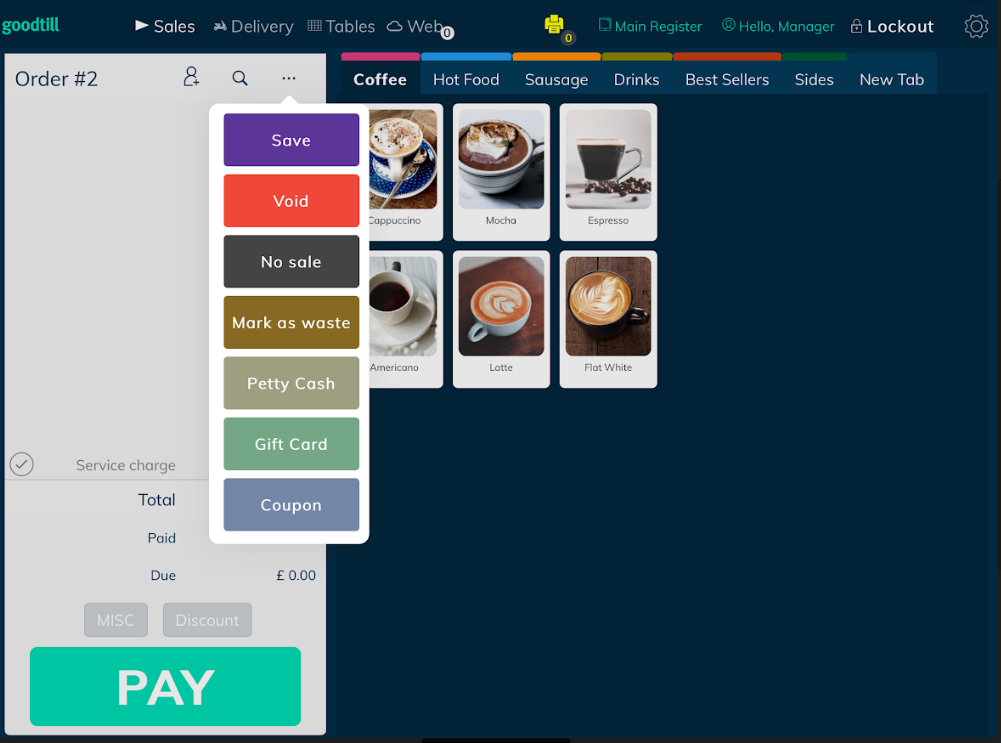
Step 1
Tap the 3 little dots to display the extra option and click on Gift Card.
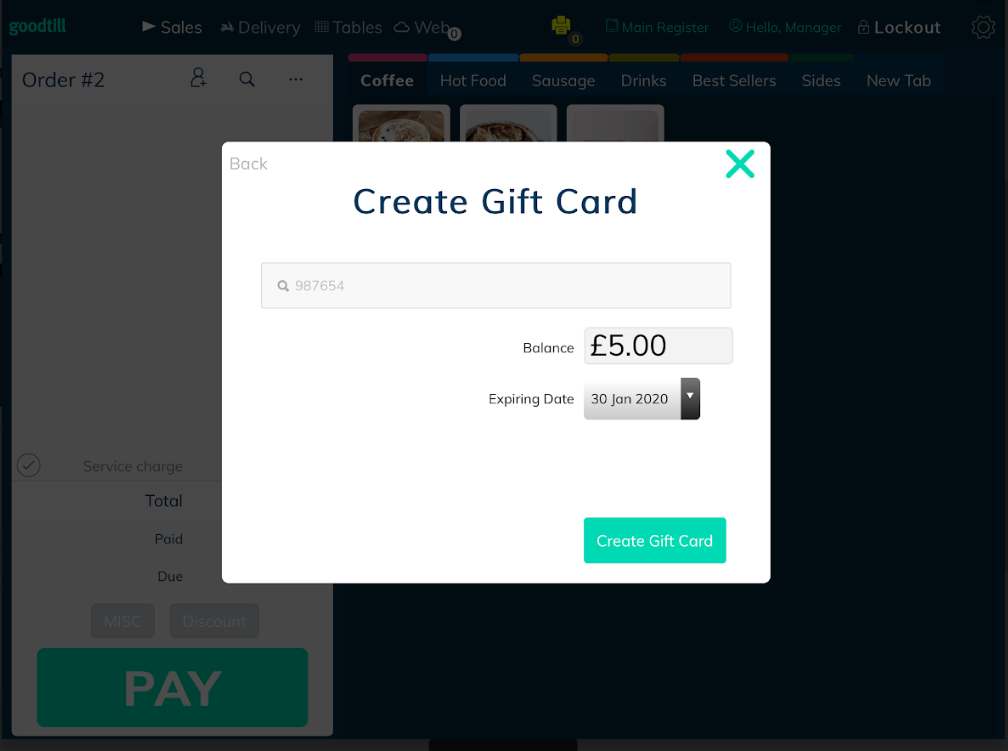
Step 2
Each Voucher needs its unique ID. For Example 987654
The system uses this ID to track the value of each Voucher and whether it is valid. If you have a barcode scanner or access to your iPad camera you can scan in your voucher to validate them.
You can type in the voucher ID number or use our auto-generated code (available on POS version 10.6 onwards) if you don’t have a scanner, or if your camera is covered.

Step 3
You are now able to add value to the Voucher.
Tap on the Balance section and input the worth for this Voucher. You also have the option to input an Expiration Date:
Step 4
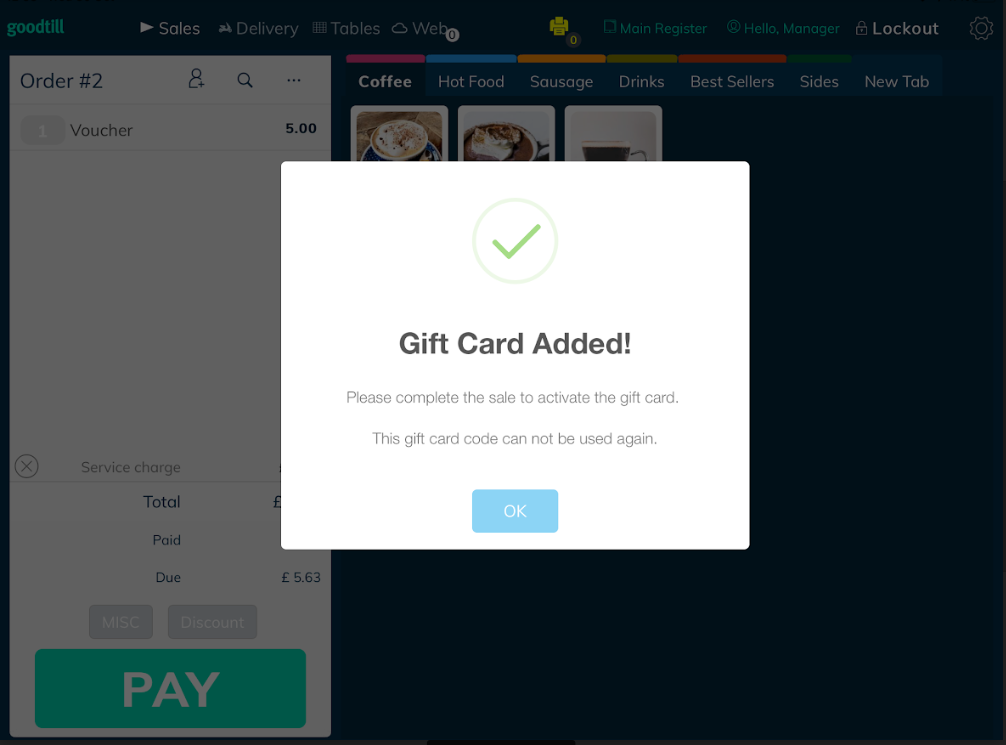
To finalise, click on “Create Voucher” and proceed to the payment screen.
Step 5
The customer can then pay for this voucher via whichever payment method they would like to use, for example, cash or card.

How to Redeem a Voucher
Step 1
Add the items the customer wants to purchase to the order.
Step 2
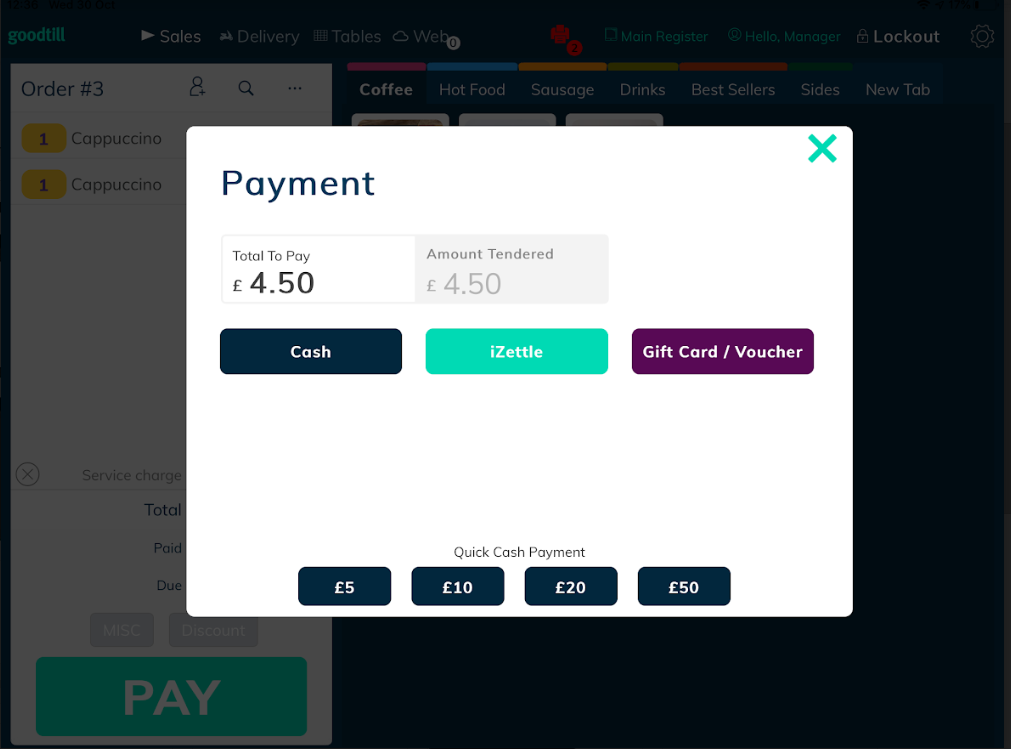
Click Pay when ready then click on Voucher as the payment option.
(If the customers require a specific amount or the value of the sale is greater than the voucher to be used click inside the Amount Tendered Box.)
Step 3
Input the Voucher ID and click Validate, and it will take the balance off the Voucher.
Printing and Emailing Voucher QR codes
Voucher emails and voucher receipts with QR codes are available on the POS app version 10.6 onwards.
When creating a voucher on the POS and assigning it a value, a pop-up prompt will appear on the screen to confirm if you would like to print the QR code.
The voucher QR code currently cannot be re-printed in the current version and will be update in future updates.
To email this directly to the customer, you may go to the cog > previous transactions > click on the transaction to expand the sale > press email receipt. This will send the customer a digital copy containing the QR code.
Once printed/emailed, the voucher can be presented by the merchant at your establishment to redeem goods.